Calling all packaging designers, do you want to speed up workflows and have more flexibility when designing?
Then 3D packaging rendering is likely your ticket.
3D packaging rendering allows professionals to visualize packaging designs before production and eliminates the need to wait for physical samples.
In this post, we’ll cover the fundamentals of 3D packaging rendering, from the design process to common challenges and solutions, as well as software to help you create 3D renders like a pro.
The Fundamentals of 3D Rendering
There are different types of rendered images. All are a form of packshots. There are:
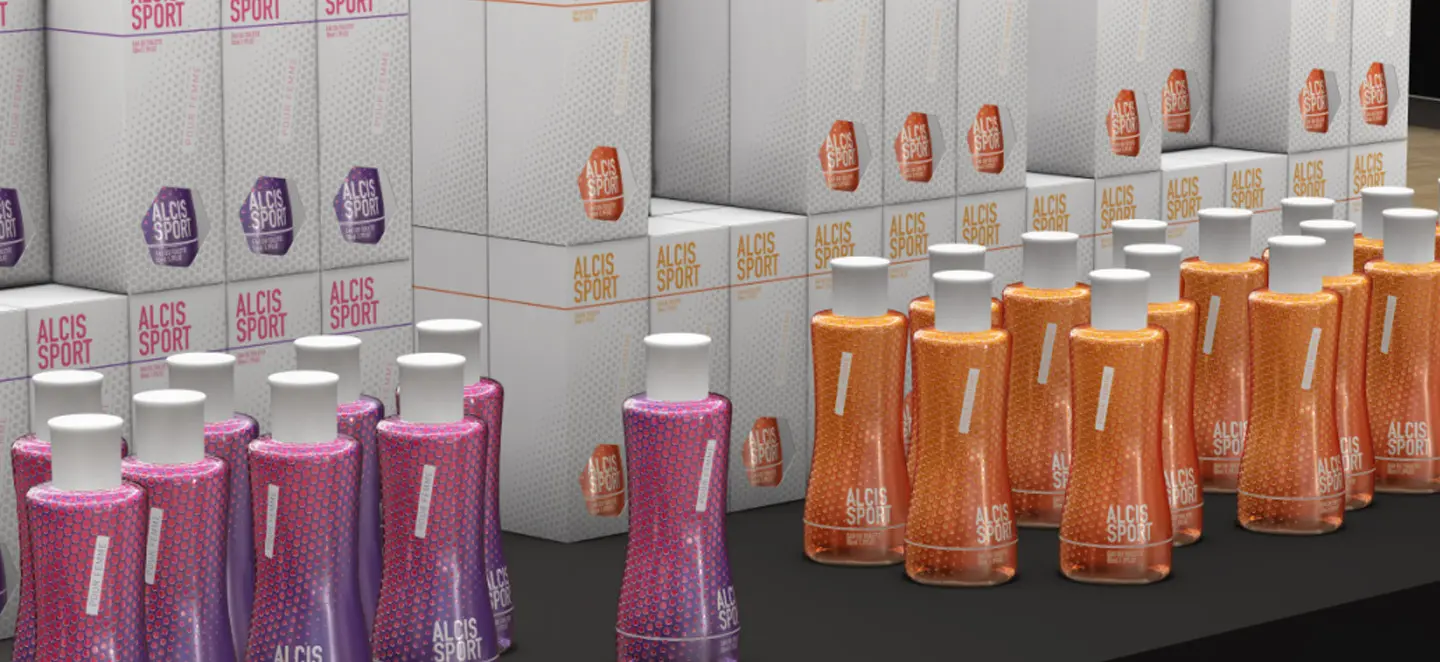
- Packshots: Basic images of just the packaging.
- Beauty shots: Images that highlight the product packaging attractively (often used for cosmetics products).
- In-context packshots: Images rendered in environments like store shelves.
All these packshots can be created one of three ways. You can take the photos manually yourself, use photoshop to create and edit images, or use computer generated imagery (CGI) to create visual representations of packaging.
Taking manual photos of product packaging is old school. In addition to being slow, you have to wait for the packaging to come back from manufacturing before you can get started.
Photoshop is a good option, but it has its drawbacks as well. Lots of people can use photoshop, which makes creating those images accessible, but they often don’t look realistic.
CGI renders are fast and hyper-realistic. They also allow for more flexibility during the design process.
However, high-end 3D rendering tools are complex, and require a 3D expert.
Common Challenges in 3D Packaging Rendering
3D packaging rendering comes with its own set of unique challenges.
While the process is very flexible, it’s difficult to represent specialty finishes commonly used in packaging such as varnishes, holograms, and matte effects.
Beyond that, representing certain packaging substrates, such as recycled materials, and how ink will behave on them, is another challenge.
That’s why organizations need high-end rendering software solutions.
Software Tools for 3D Packaging Rendering
3D rendering tools are often complex, but they don’t have to be. There are solutions available that allow teams to create 3D packaging renders easily and efficiently.
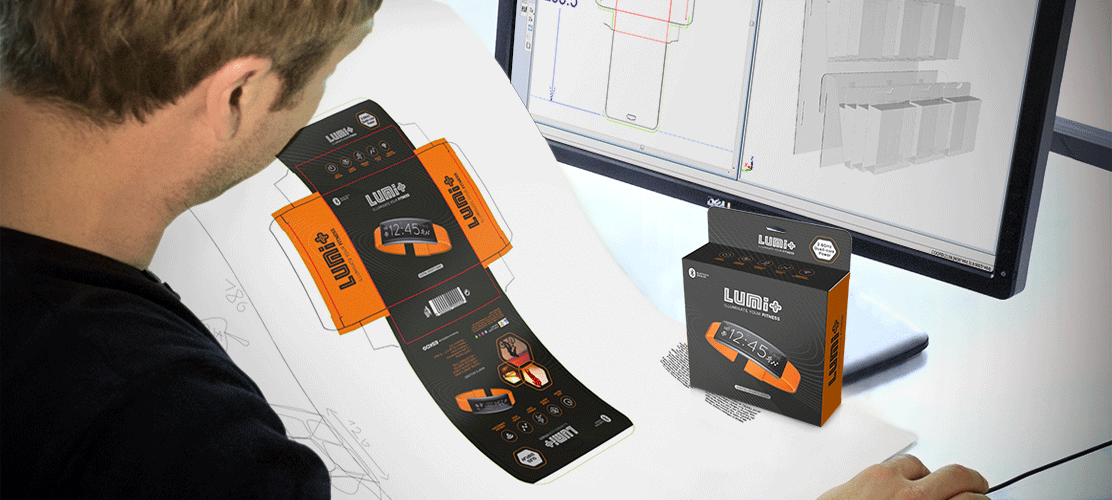
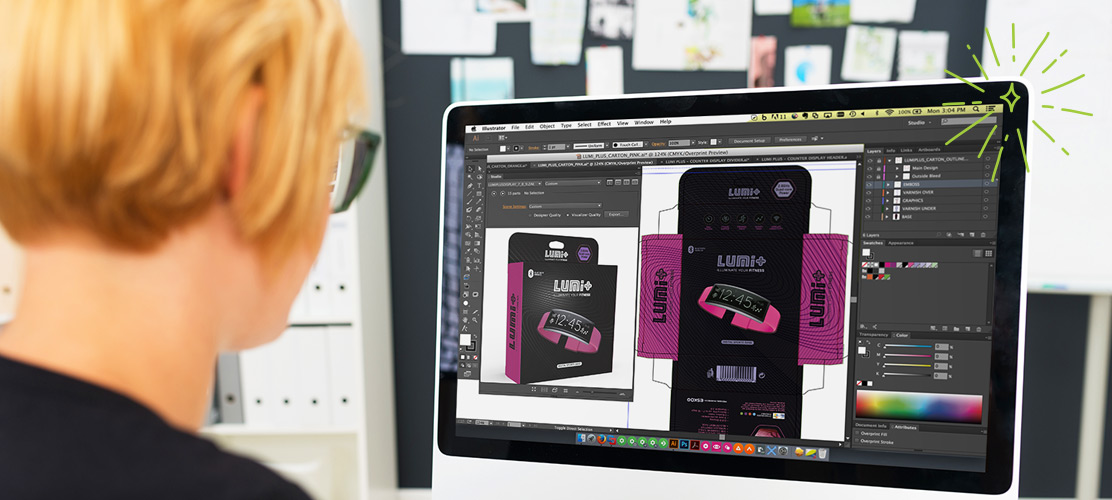
For example, Studio, 3D packaging design software from Esko, offers photorealistic rendering that includes material and production considerations.
It includes patented print modeling for realistic predictions of production results. Studio is also integrated into Adobe Illustrator®, which makes it intuitive for graphic designers.
Studio enables graphic designers to create packshots seamlessly, without the need to add an additional high-end operator to do so.
Finally, designers can create 3D renders in Adobe Illustrator® or offload the renders to the Cloud.
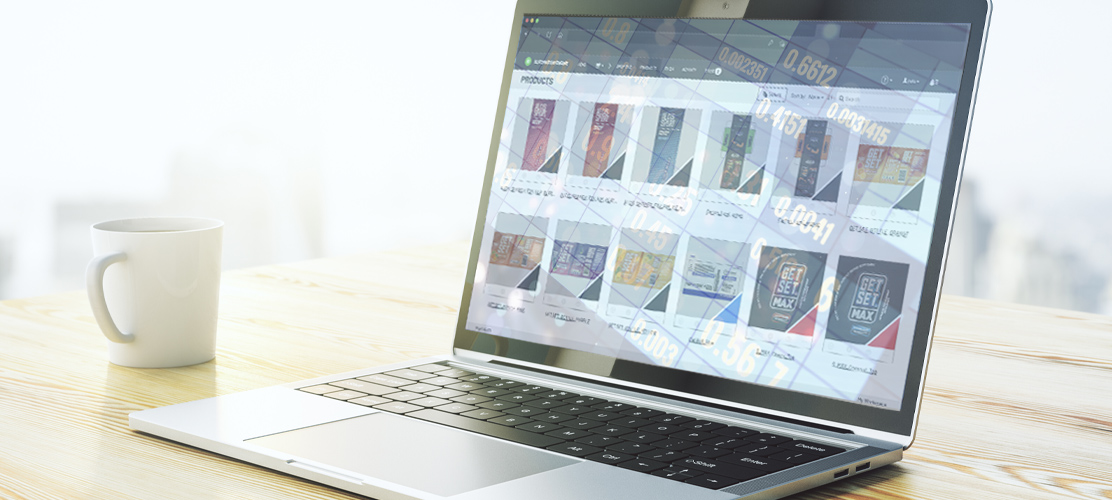
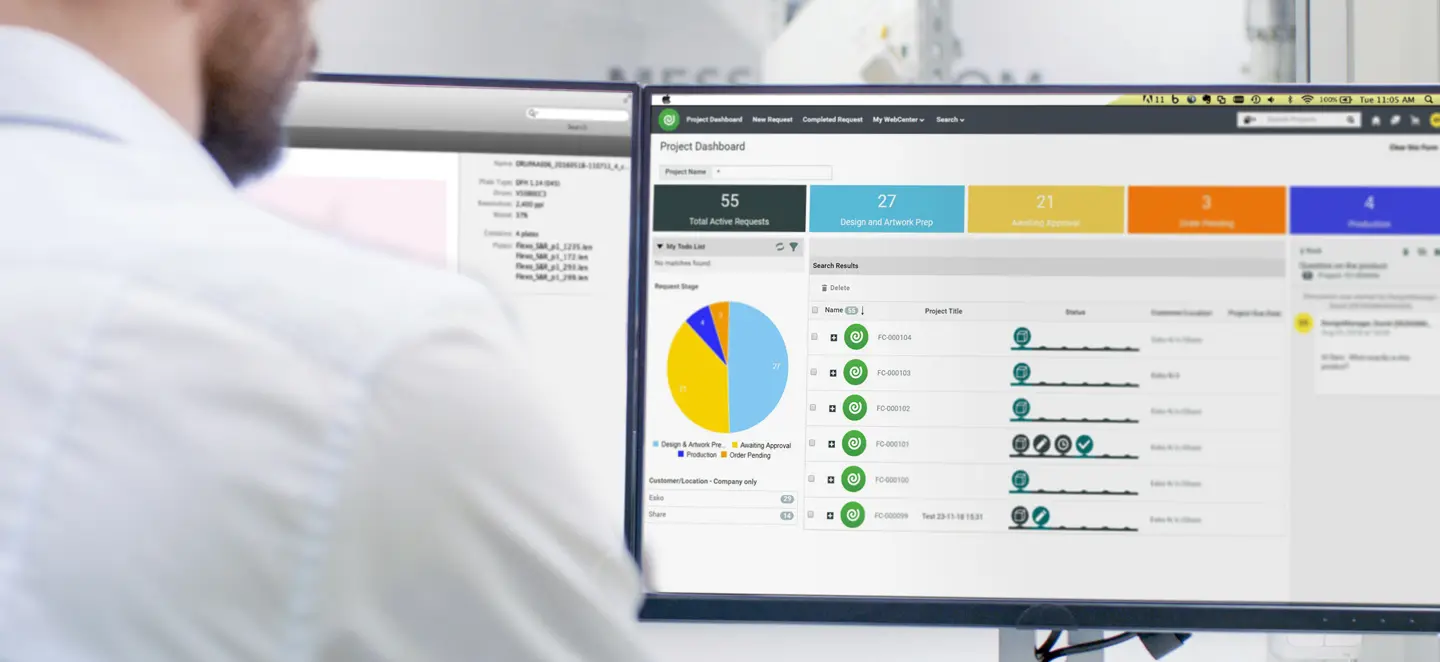
WebCenter, a packaging management solution, connects the rendering engine to the collaboration and approval workflow.
Once artwork is approved in the system, it automatically creates GS1-compliant packshots. WebCenter can also be configured to create many other, retailer-specific formats.
Together, Studio and WebCenter automate packshot creation to save time, ensure consistency, centralize asset management, and streamline processes.
The 3D Packaging Design Process
So, what does a 3D packaging design workflow commonly look like? Organizations often find themselves moving through the following steps (accomplished with Esko WebCenter and Studio):
- Define product requirements (e.g., food safety, weight considerations).
- Select packaging format (e.g., folding cartons, bottles, pouches).
- Create CAD files and 3D models for the structural design.
- Develop artwork and labeling in WebCenter.
- Combine structure and artwork for rendering.
- Review and approve to ensure alignment among teams before final rendering.
- Render packshots using approved artwork and labeling from WebCenter in Studio.
Best Practices for High-Quality Renders
To ensure the best results:
- Prepare artwork and models carefully to ensure all assets are accurate and optimized.
- Set up the environment thoughtfully by paying attention to lighting, backgrounds, and resolution requirements.
- Follow standards such as GS1 specifications for packshots (e.g., resolution, image sets) and customize renders to meet retailer-specific requirements.
What’s New in 3D Packaging Rendering
The design world moves fast. Technology moves even faster. As we speak, existing technologies are continuing to evolve, and new technologies are emerging.
For example, offloading renders to server farms, as Esko does with packshots, allow for faster image generation. This technique sends renders to machines whose sole purpose is to generate images.
Additionally, in the past, ‘render’ usually meant a flat, 2D image. However, as companies create more 3D renders, new file formats such as GL Transmission Format Binary (GLB) are becoming standard for interactive packaging representations.
Take Your Packaging Designs to the Next Level
3D packaging rendering is clearly altering how packaging is designed, created, reviewed, and approved.
With tools like Esko Studio and WebCenter, teams can:
-
- Save time by automating workflows.
- Achieve photorealistic results that reflect production realities.
- Stay ahead of industry trends with cutting-edge technology.
Ready to take your packaging designs to the next level? Book a discovery call and see the difference for yourself.